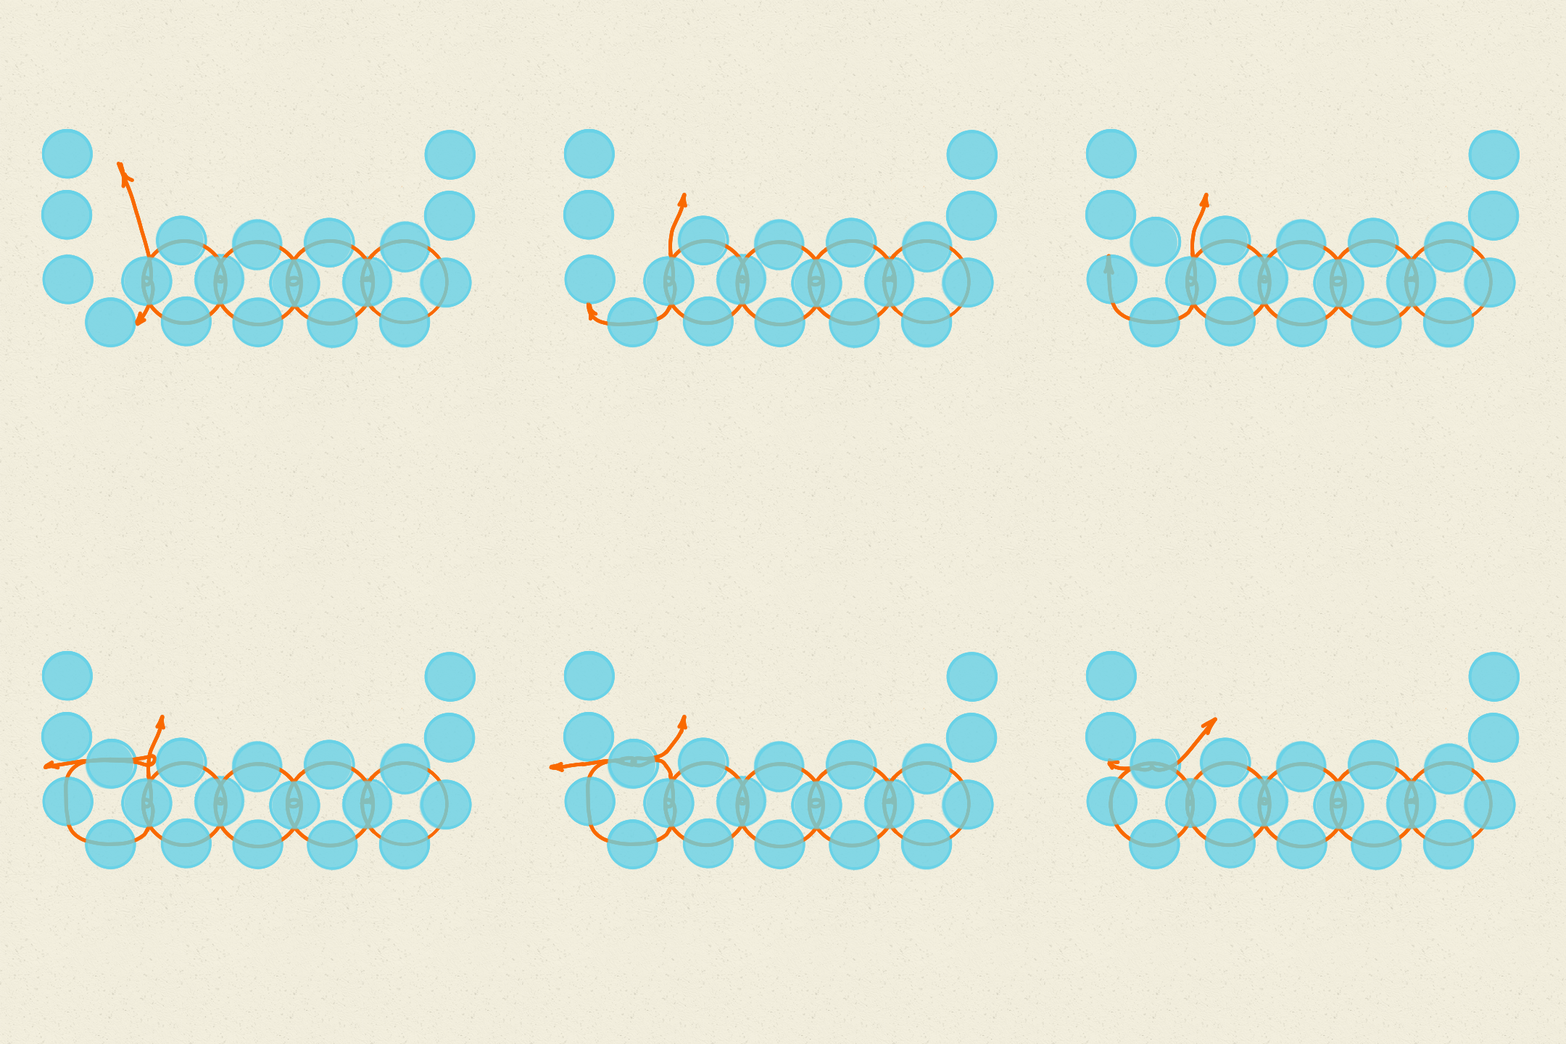
Use the loop technique (locking style) for better tension and durability and the cross-weaving for flexibility.
Cut the threads at a sharp angle.
Start with a thread length of no more than 40 inches. As you get more comfortable, you can use a longer thread (about 80 inches).
From time to time, tighten your work and align the beads so they sit evenly.
Use a crochet hook for tight spots, or curl the thread ends by pulling them against the edge of your scissors.
Don’t throw away leftover thread scraps — they may come in handy later (for example, to attach a clasp or a button).
Loop technique
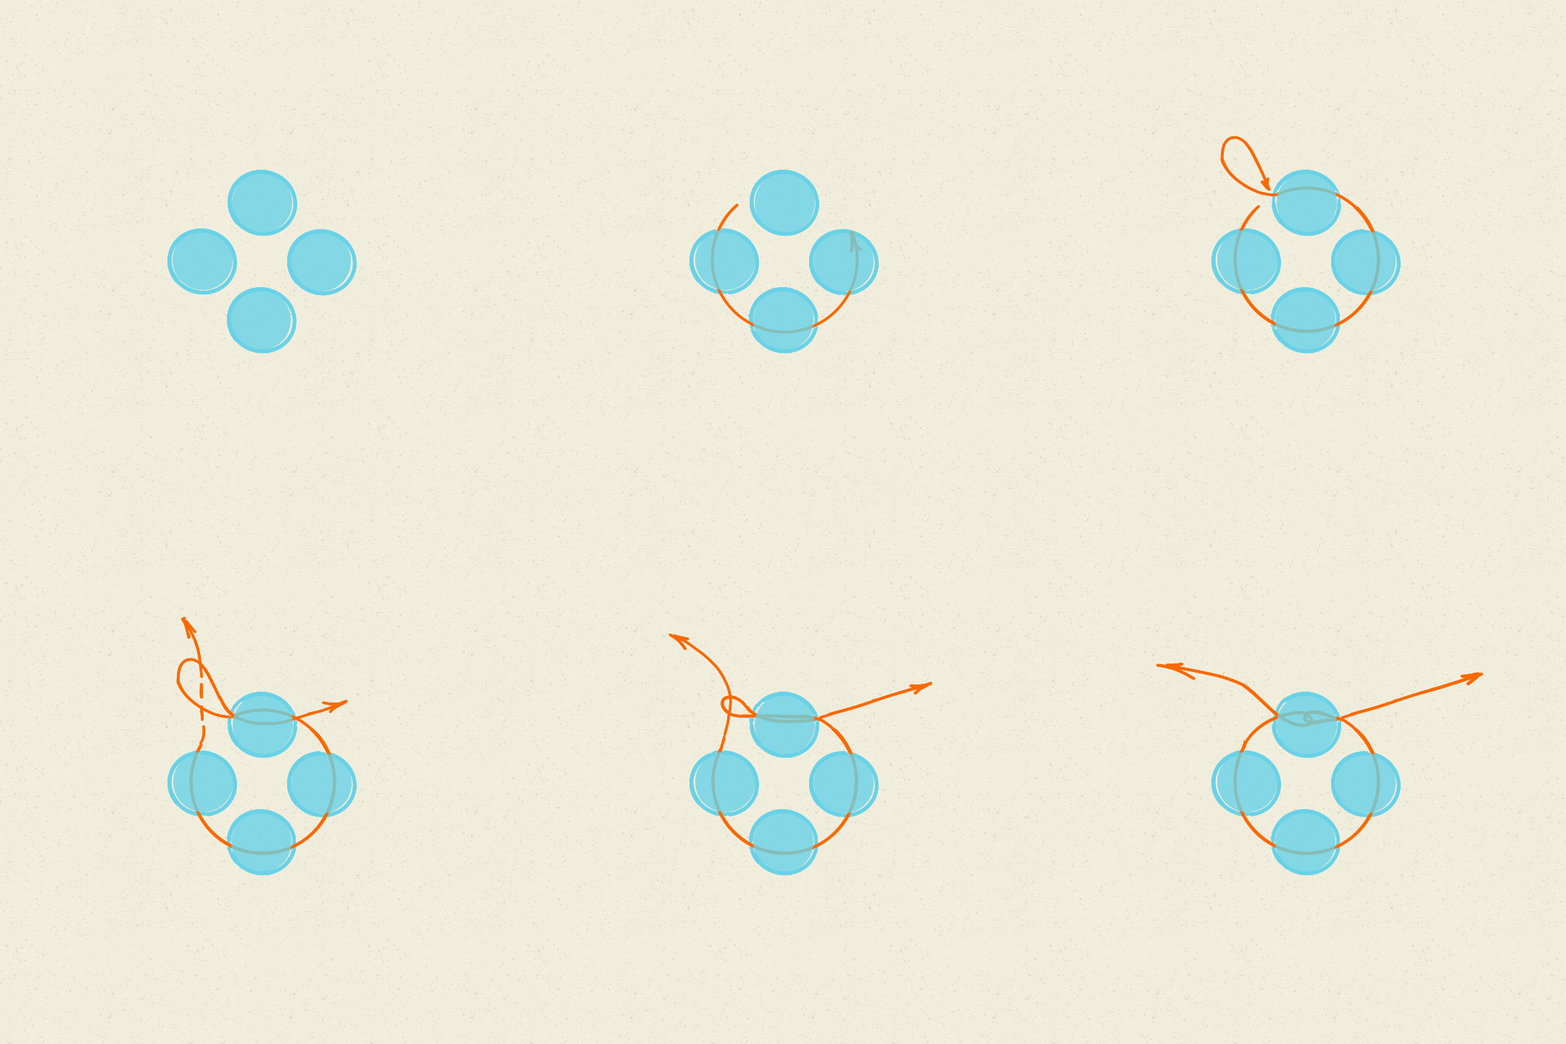
String four beads onto the thread and even out the ends.
Then, pass one end of the thread through the last bead to make a loop.
Pass the other end of the thread through the loop and tighten it.
The knot should be in the middle of the bead’s hole. This creates a cross shape.
Weaving the 1st row of crosses
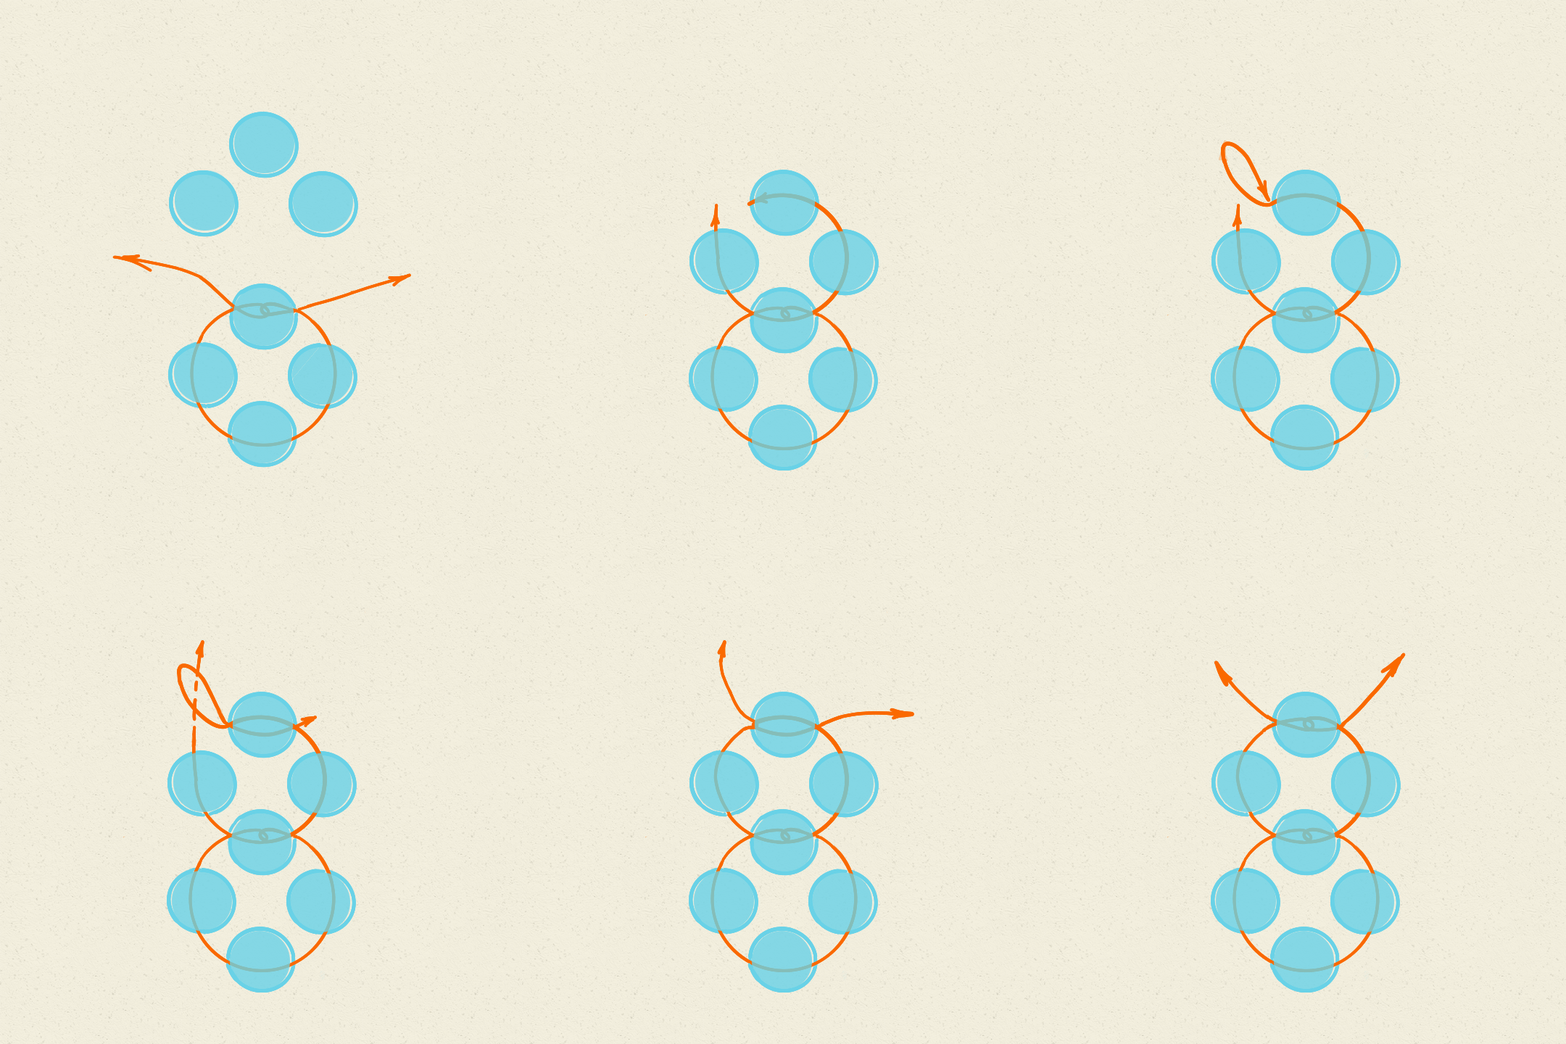
String one bead onto the left end of the line, and two beads onto the right end of the line,
make a loop in the last one,
tighten the knot in the middle of the hole.
Next, continue to perform the same steps. This will create a row of crosses.
End of the 1st row of crosses
When you need to move up to the 2nd row of crosses, you should form the last cross by adding three beads onto the lower line. Then make a loop, tighten.
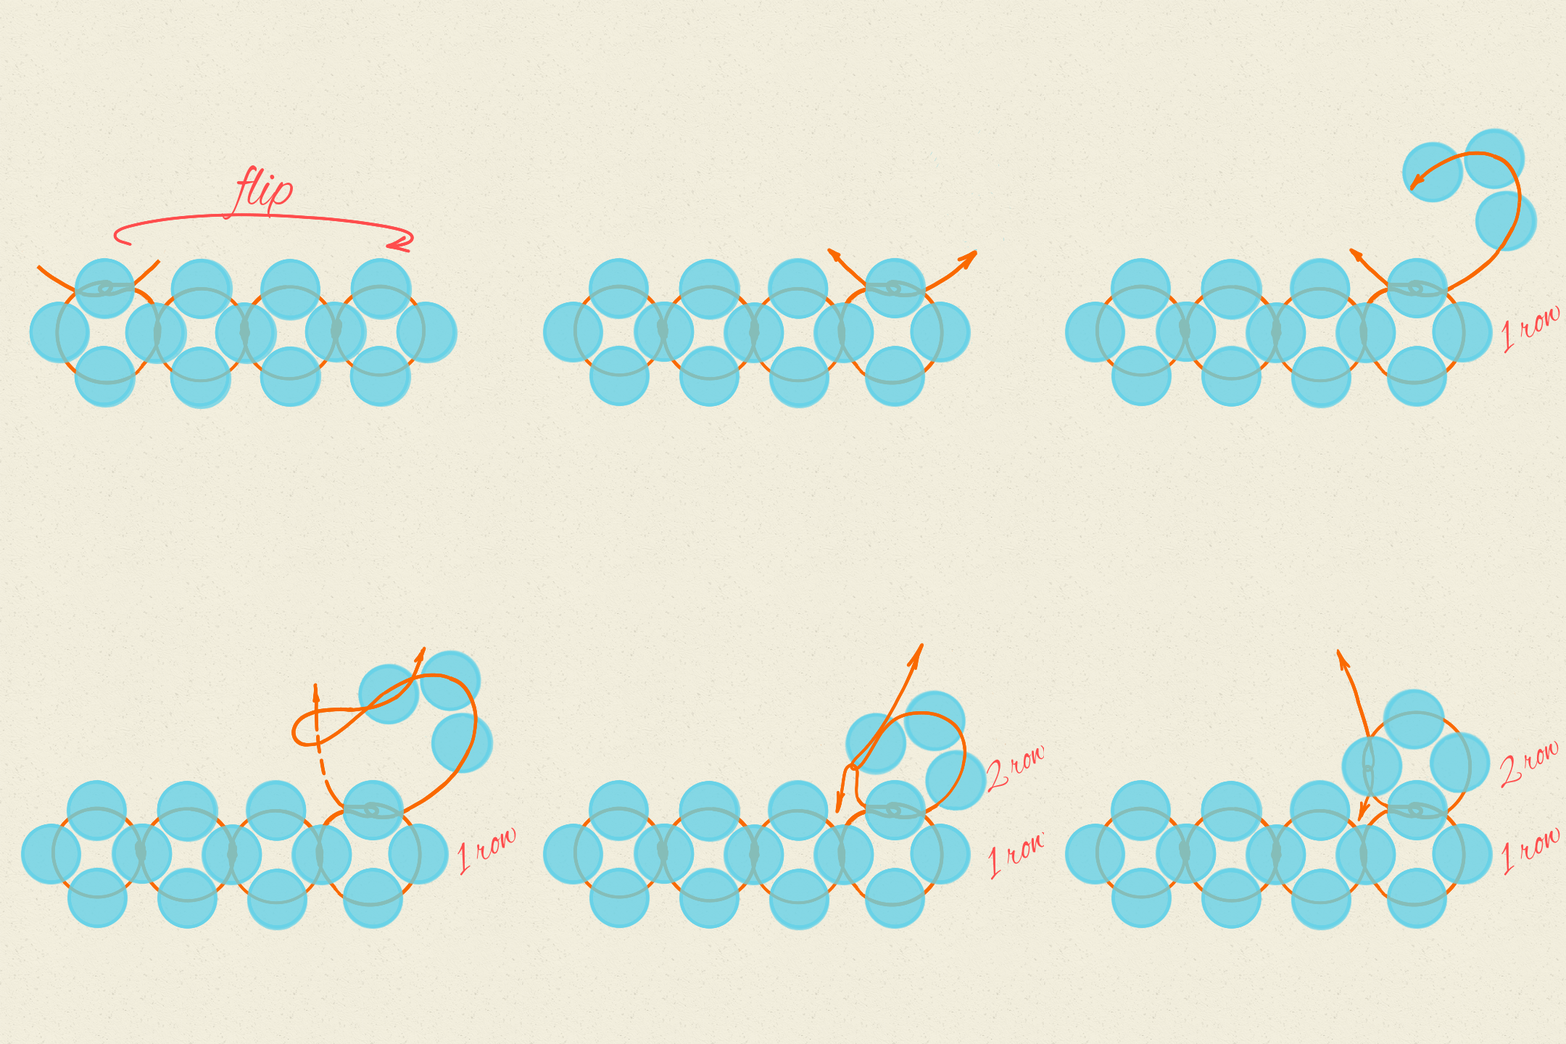
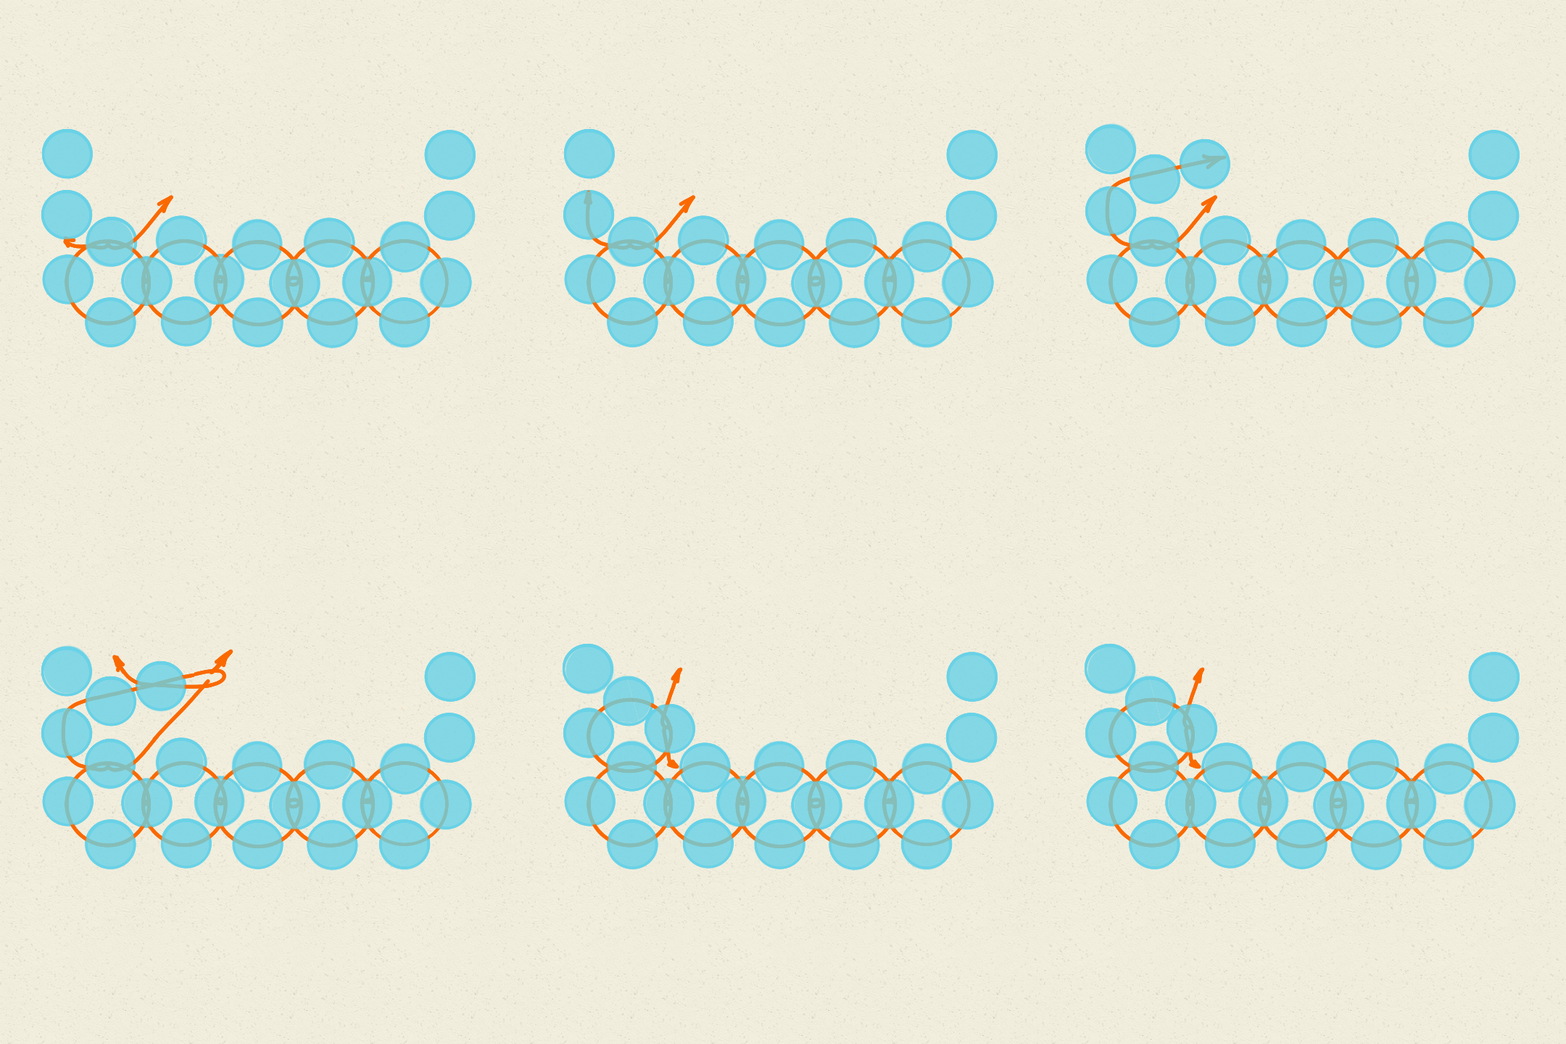
Next rows, the 1st cross
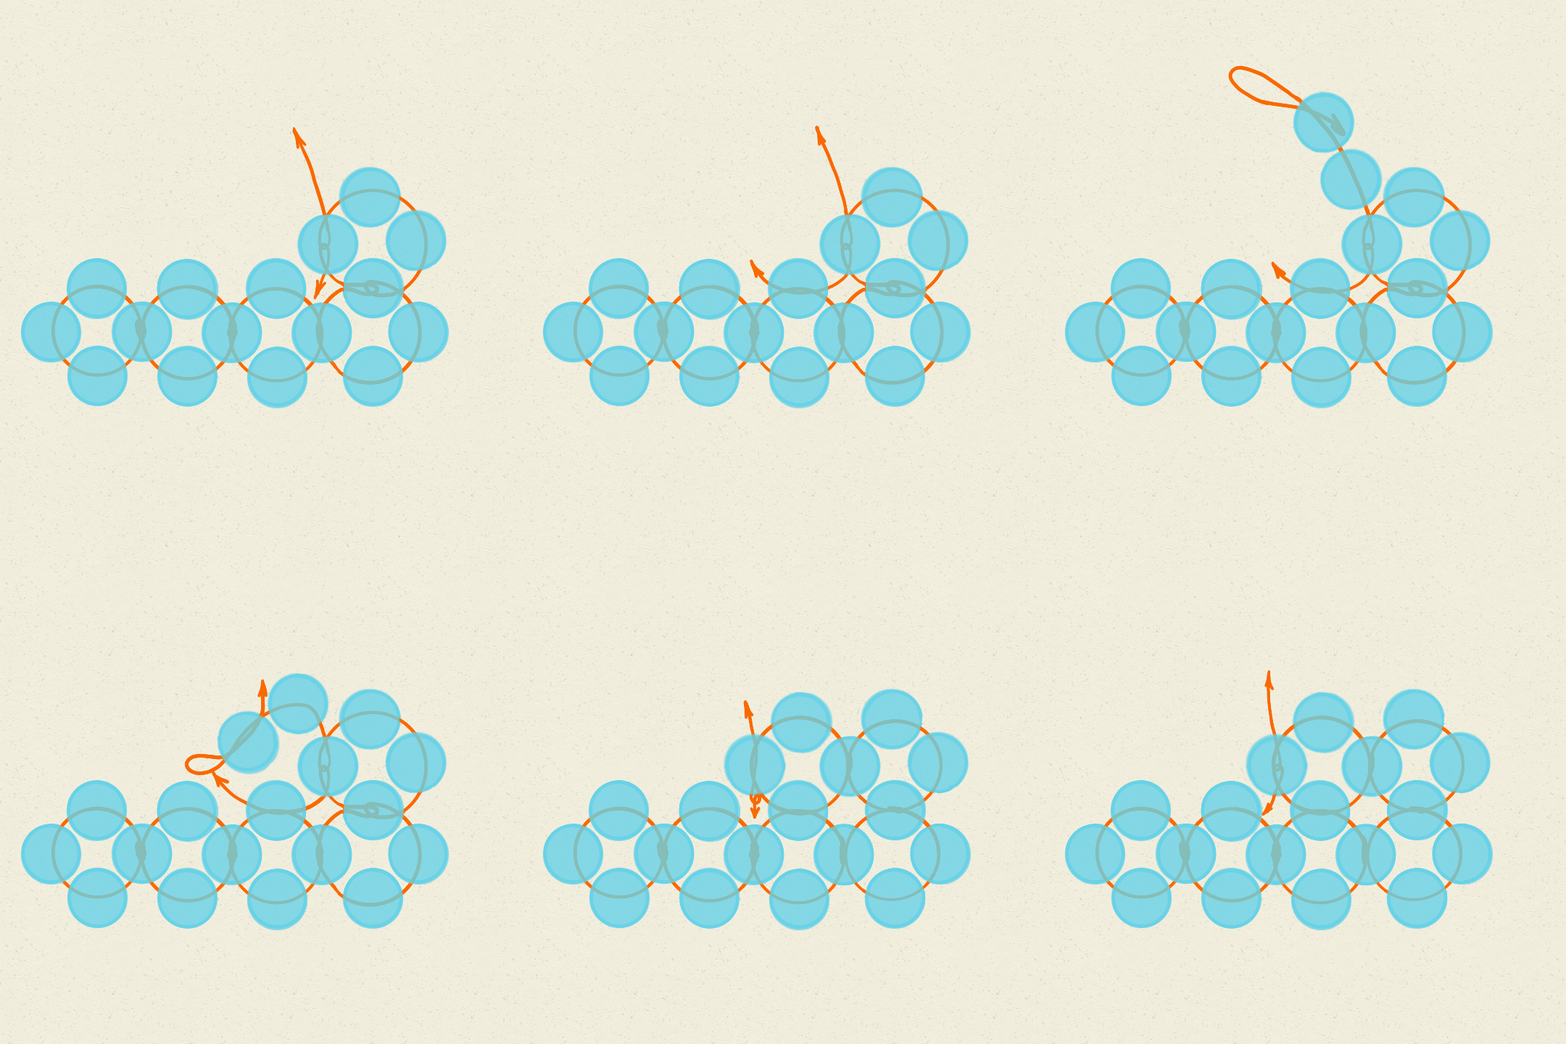
Turn the weaving over and continue with the next level row.
Put three beads onto the right thread, make a loop in the last one, and tighten.
Weaving the next rows
Pass the bottom thread through the adjacent bottom bead,
string two beads onto the top thread,
make a loop in the last one, and tighten.
Continue weaving in the same way
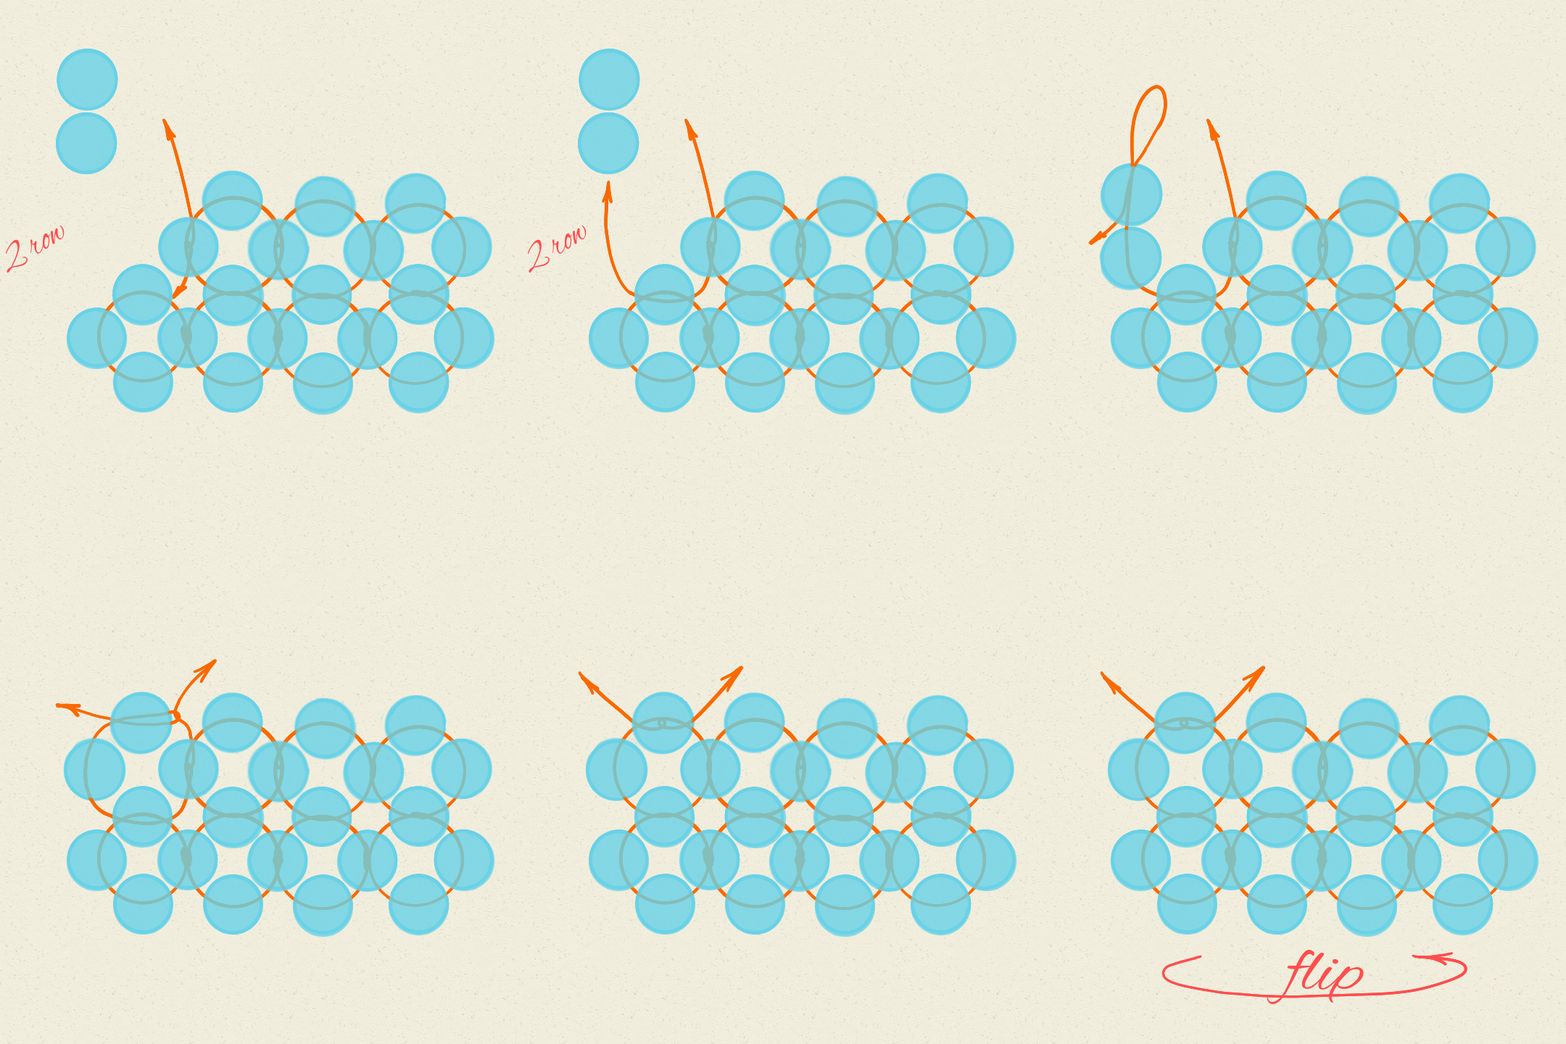
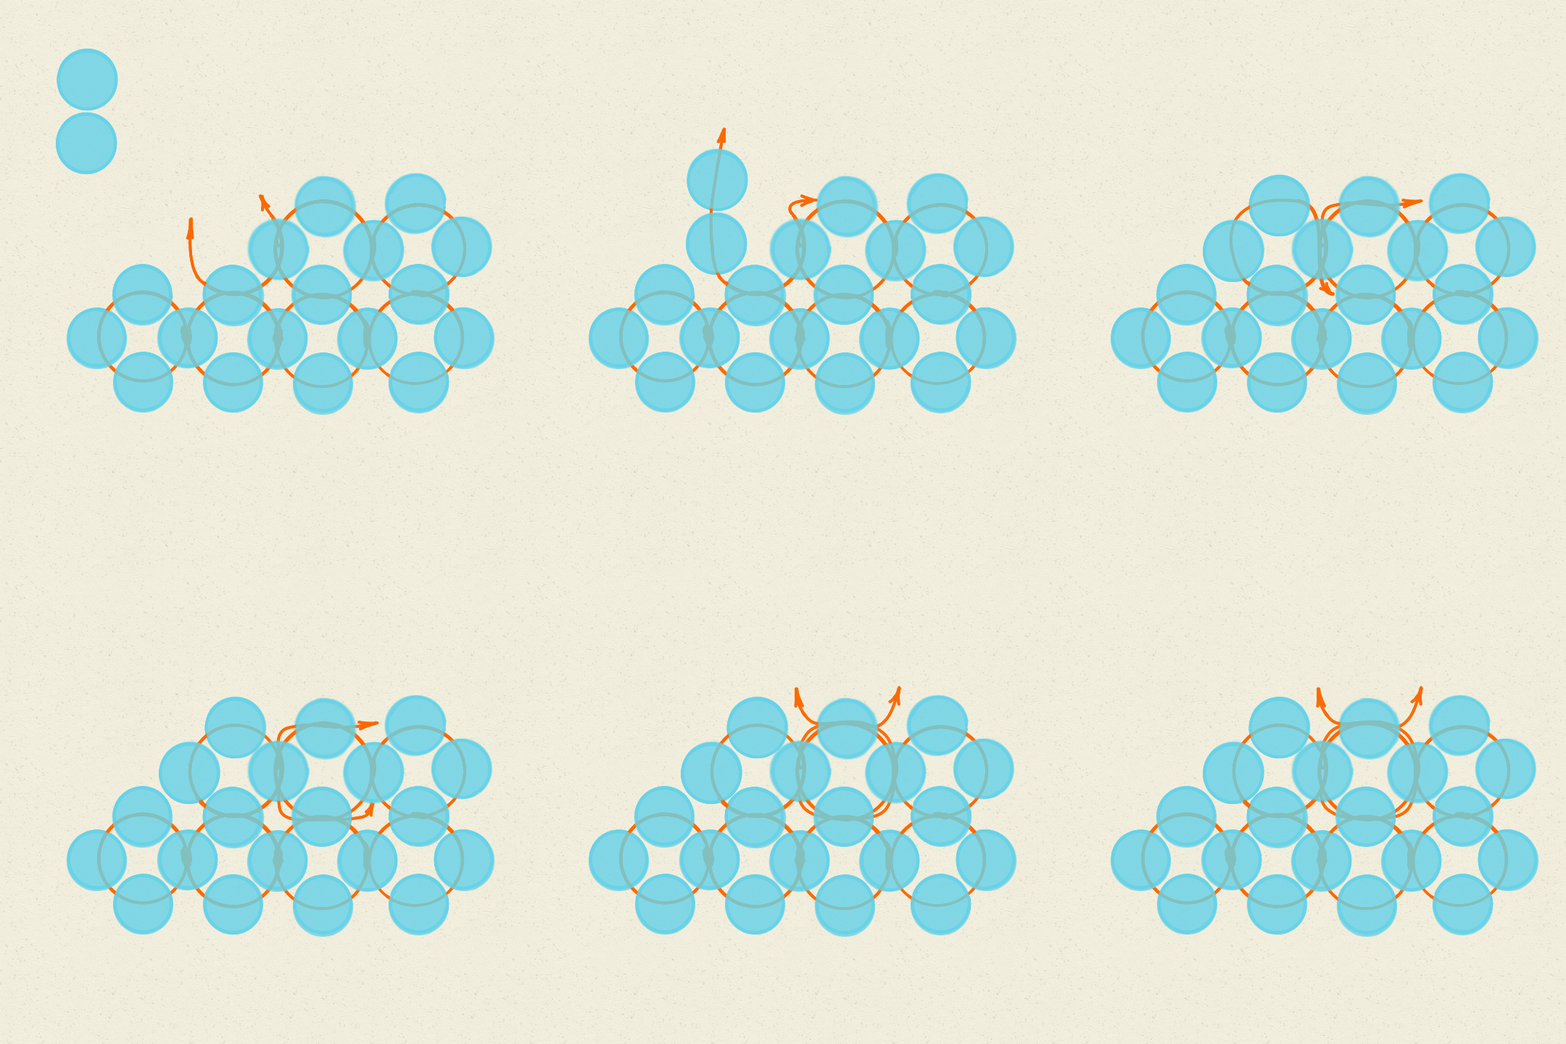
End of the next rows
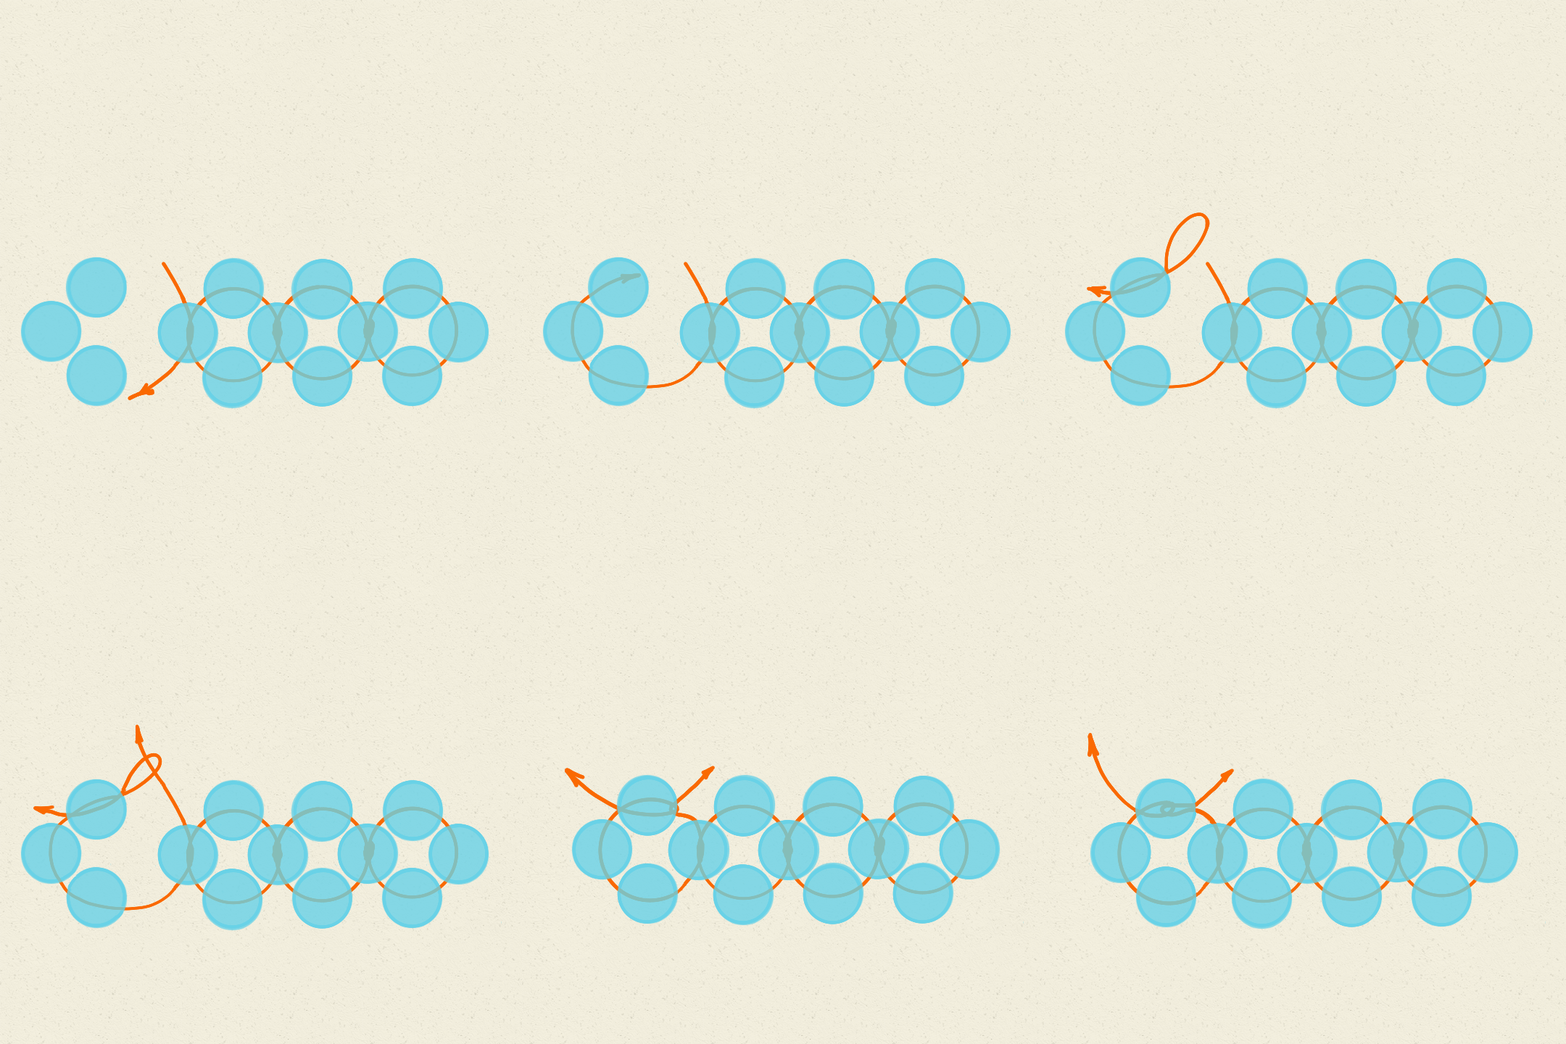
To make the last cross in the row, you should string two beads onto the bottom thread, make a loop in the last one, and tighten.
Turn over.
Continue weaving in the same way as the 2nd row until you’ve got the necessary size of the main section.
Secure the ends of the thread
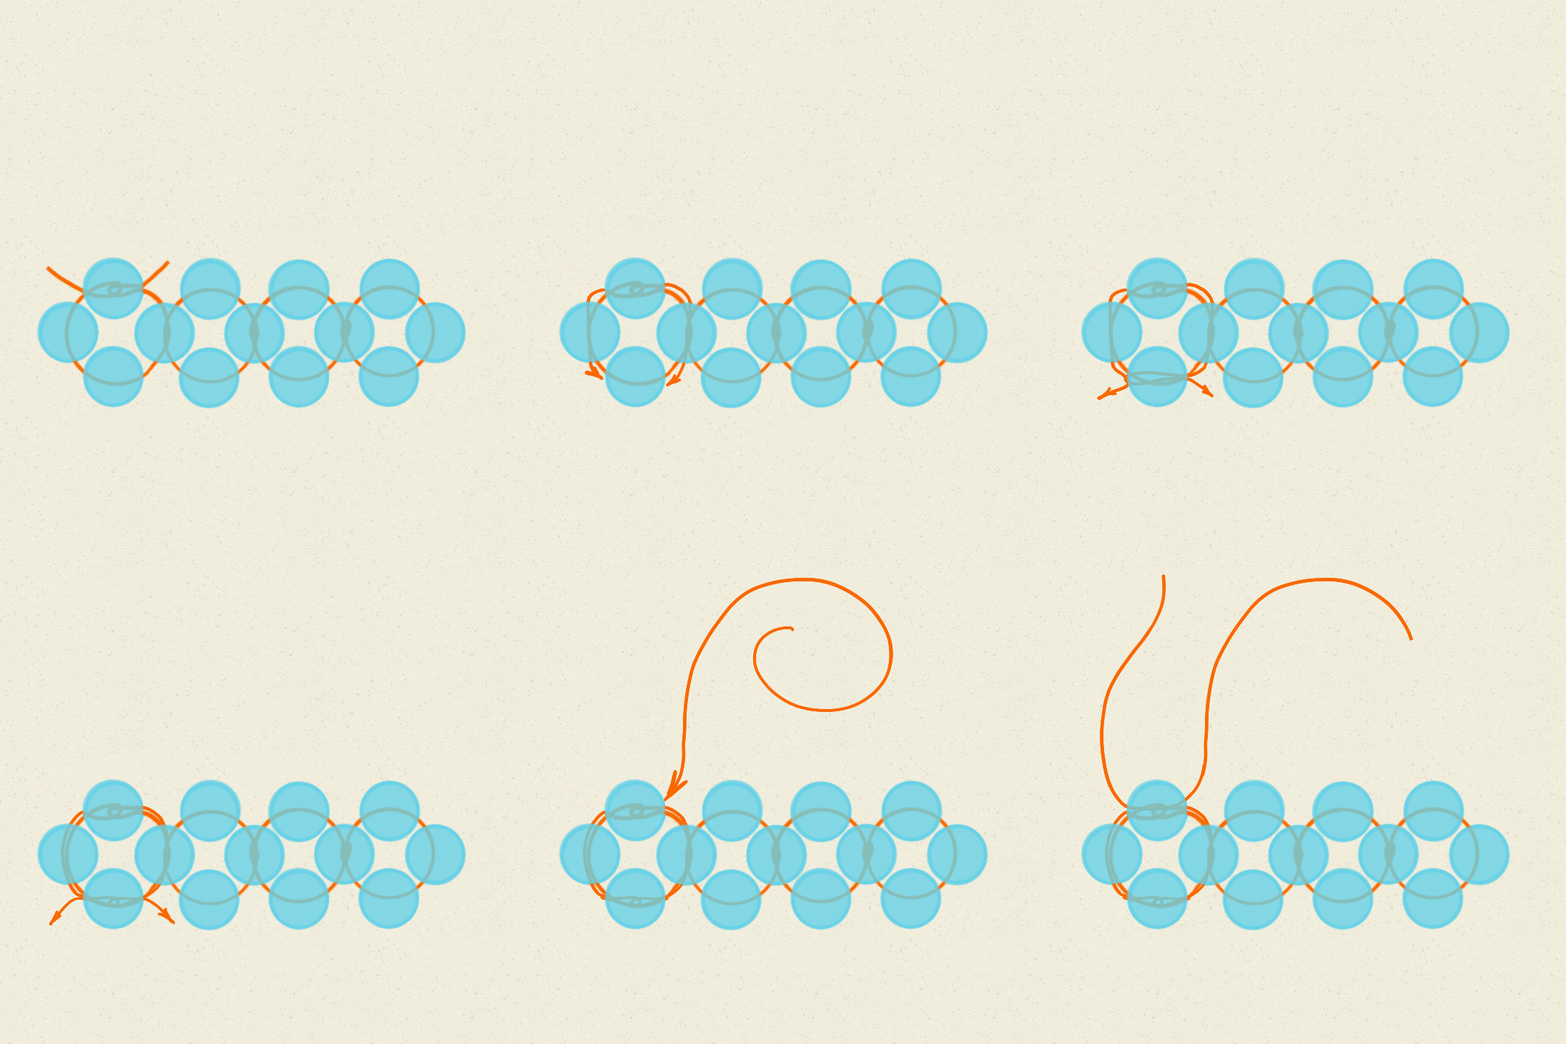
When you finish your piece or run out of thread, you need to secure the ends.
Weave the tails back through the side beads in the opposite direction. Make a loop at the bottom bead and pull it tight. Trim the excess thread close to the beads.
Important Note: If you plan to reinforce this area later (for example, to attach a clasp or a button), you may need to position the knot elsewhere, so plan ahead.
If you need to continue weaving, pass the new thread through the beads where you left off. Pull the thread until the ends are even. Continue weaving as usual.
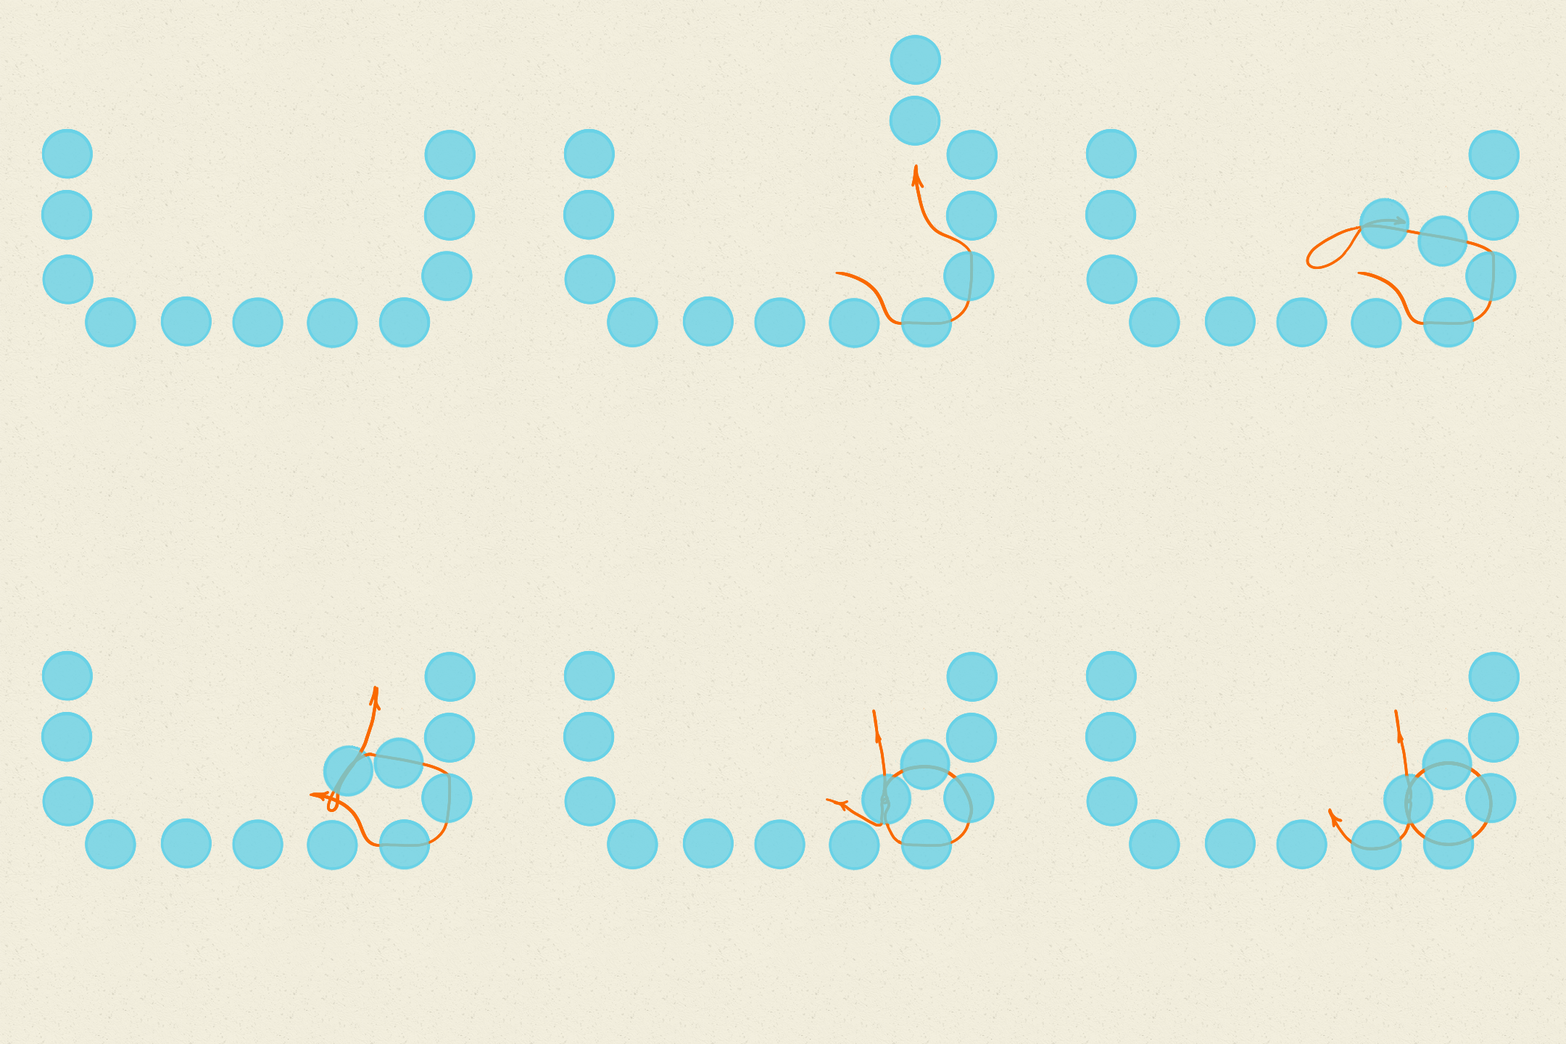
Weaving the side panels
After folding the main section at 90-degree angle pass the line through 2 beads at the bottom corner.
Next, add two beads to the top thread, make a loop in the last bead, and tighten.
Continue weaving as usual until the end of the row.
To finish the row, pass the lower thread through the adjacent lower bead, then through the side bead.
Onto the same line, add one bead, make a loop, and tighten.
To move to the next row, pass the left thread through the side bead on the left.
Pick up 2 beads, make a loop, tighten and continue weaving until the very end in the same way.
Decreasing a row
Sometimes, the design calls for fewer crosses (units) in the next row.
In this case, it doesn’t matter where you tie the knot in the final cross.
You can even skip the knot entirely—simply pick up 2 beads to finish the last cross.
Then, weave the thread back through the beads from the last cross into the previous one to get into position.
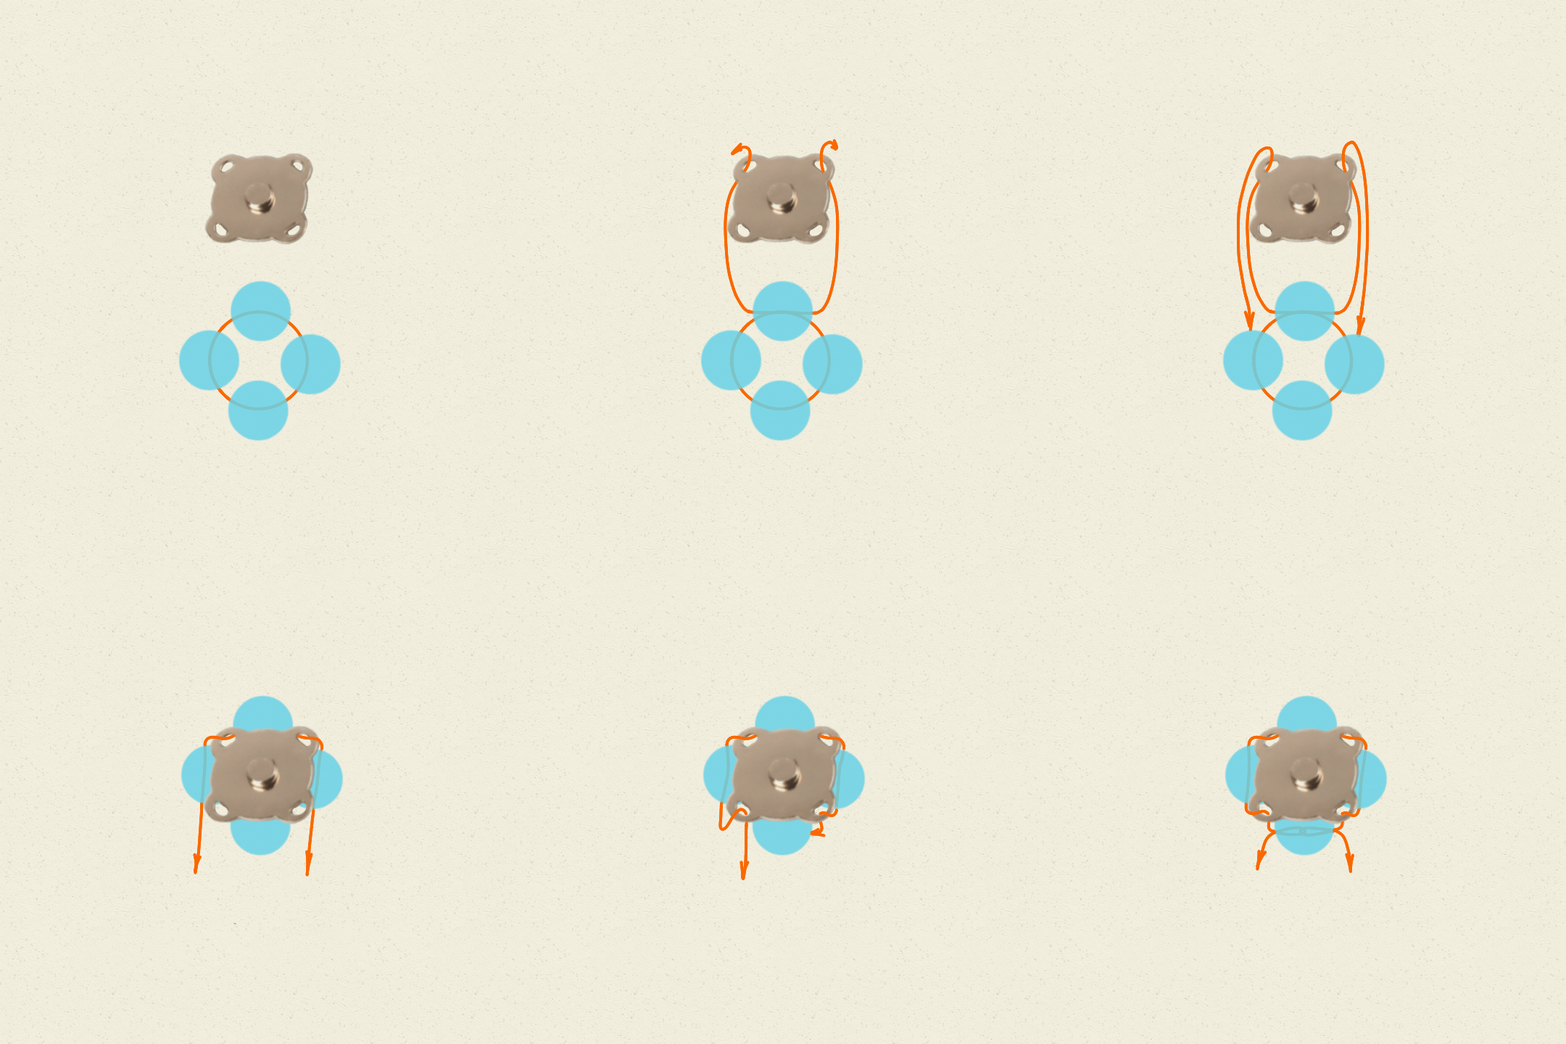
Attaching the clasp
The clasp consists of two parts; the attachment technique is the same for both.
Pass the thread through the top bead of the cross (unit).
Guide the thread end through the hole in the clasp, then down through the side bead.
Repeat these steps on the other side.
Again, pass the ends of the thread through the holes in the clasp.
Make a loop at the bottom bead and pull it tight.
To secure the ends, weave them down through the side beads of the adjacent cross (unit) and secure them with a final knot at the bottom bead.